Wednesday, February 8, 2012

Week 6 - Glittered Key


I hate how boring keys look.  I refuse to spend $4.00 or more for the decorative keys you can buy and have cut, especially when we're renting an apartment, so it's a key that I'll eventually have to give back to the landlord.  Needless to say I was excited to find this fun and simple way to decorate my house key.

I don't know where the original idea started since the pin I found went to nowhere, but I followed the instructions in the description and it worked.


The items I needed were simple:  my key, some Mod Podge, and glitter.  Apply Mod Podge all over the key, doing one side at a time.


There are two ways to apply the glitter.  You can apply it with a brush, or just sprinkle it onto the key.  For trial purposes, I tried both and using a brush was just a pain.

Be sure to apply a good coating of the glitter. Wait until the key is completely dry to shake off the excess.  Once dry, apply another coat of Mod Podge to act as a sealer.  Follow the instructions to complete both sides of the key and you're good to go - a pretty new personalized key.

Monday, February 6, 2012

Week 6 - Coffee Filter Roses


Ever since my daughter started school three years ago, we have always made homemade valentines rather than using store-bought ones for her classmates.  This year was no different.  I went through so many ideas in my head, but money was tight and it wasn't in the budget to do our original plan.  That meant searching for a back-up.

Then, a couple of days ago, I came across this pin for Coffee Filter Roses, originally posted on the Craftbits website.  Honestly, the instructions left a lot to be imagined.  It gave the basics for making the rose itself, but not really much in the way of finishing the rose.  I used my imagination, thinking back to a Girl Scouts craft we did, and got started.

I followed the instructions to make the rose, stacking three coffee filters on top of each other.  I folded each stack in half twice, then twisted at the bottom and secured it with masking tape (it seemed stronger for this craft than scotch tape).  Then I just used my fingers to separate the "petals" out, fluffing as I went to help achieve some fullness.

 The next step, in my book, was to form a stem.  Craftbits didn't give any information on how to do this.  I took a pipe cleaner, cut it in half, then wrapped one end around the taped section.
 Next I used some floral tape to secure the pipe cleaner to the rose itself.  I continued wrapping the pipe cleaner all the way down, then back up again, to give it some thickness and stiffness.

They were starting to look less like coffee filters now and more like roses.  

Next came the decorating. Craftbits suggested using some paint and a brush to color the roses.  I tried this, using both a wet brush and a dry brush.  I didn't like how either method turned out.

It was actually my husband who reminded me of a craft we did with our Girl Scouts Troop that was used to paint coffee filters. We used markers to color on the filters then sprayed them with water, watching the colors bleed together to form magical patterns.


We did a modified version of this, watering down some acrylic paint then dipping the rose into the paint, doing only the tips of the rose.
 We then placed the roses upside down on a piece of cardboard to allow time for the paint to bleed and dry thoroughly.

Some of the flowers had to be secured with a little more tape.  After doing a couple of test runs, I found that it was more effective to make the roses, then dip and dry, then attach and wrap the stems at the end.  


Daisha loved how the roses turned out and had a fun, unique valentine to present to her teacher and classmates.

Sunday, February 5, 2012

Week 6 - Crocheted Slouchy Hat


This was one of the first hat patterns I came across when I started learning to crochet.  I attempted it two different times before this and was unsuccessful.  As I sat watching one of the many awards shows on this time of year, I decided to make one final attempt.

The pattern was created by Julie at Gleeful Things.  The pattern actually calls for one skein of heavy weight yarn.  Since I didn't have any heavy weight yarn on hand, I opted to do a double strand of worsted weight yarn.  This hat was made with Red Heart Super Saver in Shaded Dusk.


If you're interested in making one of these for yourself, you can find the pattern here.  If you don't know how to crochet but would like one, you're welcome to pick up the yarn of your choice and I'll make you one.

The hat is super cute for all hair lengths, though it is tricky to put on if you want to do it without pulling your hair back into a ponytail first.

Week 5 - Crocheted Camera Strap Cover

I have come across all kinds of designs for DIY camera strap covers, all of which were sewn.  I have really been wanting to make one, but just don't have the money to go shopping for supplies right now. With a wedding and a family shoot both coming up within the next couple of weeks, I knew I needed to find something that was more comfortable.

One night I opened my email to find this pattern by Rachel at Maybe Matilda sitting there in all of its glory just calling my name.  I pulled over the leftover yarn from my daughter's Simple Kerchief since it's super soft and got to work.

This cover is removable since it's not crocheted around your strap, but let me just say that it is super tricky to get on since the ends are narrowed.  In the end, though, it is so much more comfortable to wear the strap now and is definitely worth the hassle.


Saturday, February 4, 2012

Week 5 - Buffalo Chicken Bites

With the Super Bowl tomorrow, I knew I wanted to try something fun with the chicken tenders we had in the refrigerator.  I absolutely love buffalo wings and wanted something similar but not exactly like them.  I came across a link for these Buffalo Chicken Bites on the website What's Cookin', Chicago?

At first I was skeptical as to how they would taste since Joelen's bread seemed so simple.  It turned out delicious.  I will openly say that I had to make a couple of alterations to the recipe to suit my family - we left the blue cheese out completely, and I forgot to add the melted butter.  (I apologize for not having step-by-steps pictures like I normally would - I was in a hurry to get them done.)

Since my recipe wasn't exactly as hers, you can check it out on her website, but let me say that they were so yummy served up with some cold ranch dressing.  We'll be having leftovers for dinner while we watch the Big Game tomorrow night!


Wednesday, February 1, 2012

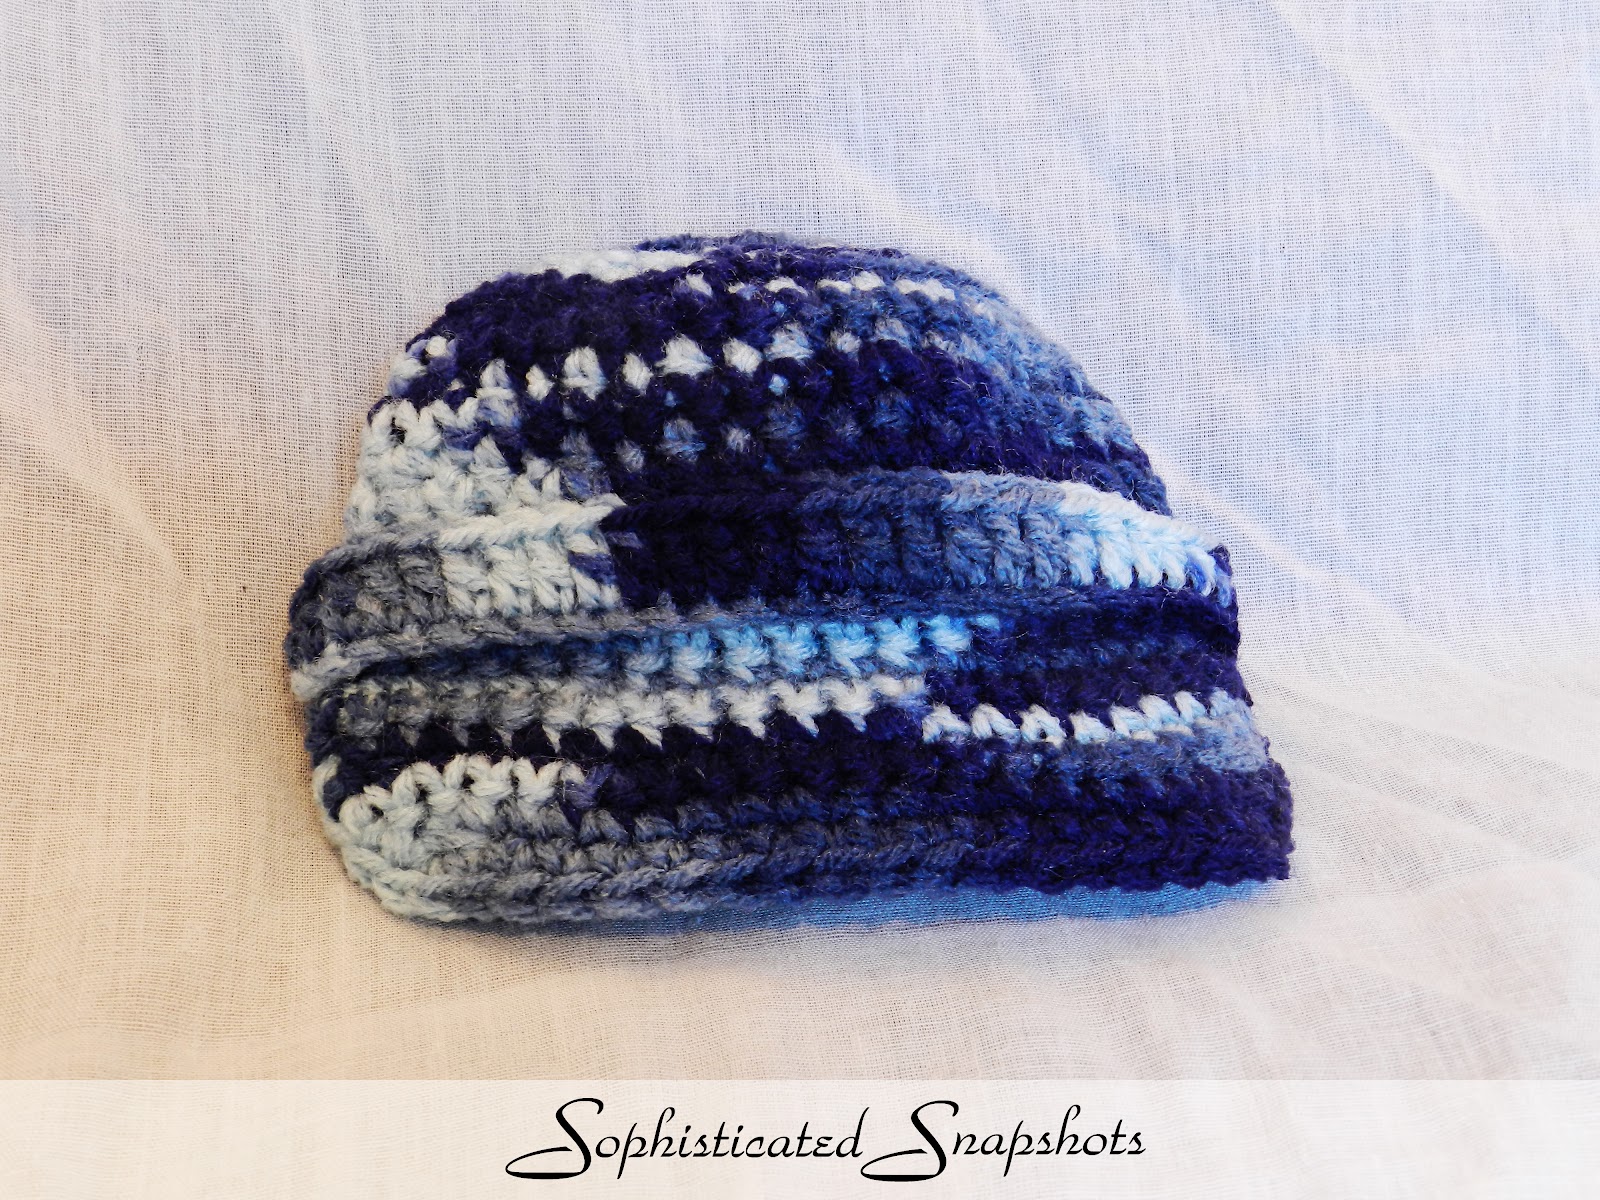
Week 5 - Little Brimmed Hat

Of the crocheted hat patterns I've completed, the majority have been for little girls.  I recently came across an adorable newsboy-style brimmed hat that I knew had to be my first for boys.  The pattern came from Kristi at Knotty Knotty Crochet - you can find it here if you want to try one out for yourself.


I selected a variegated yarn from the Red Heart Super Saver line called Shaded Dusk.  I have not yet picked up any buttons to stitch on, but will be doing that soon.  I absolutely can not wait to try this on an adorable baby boy - I'd make one for my 3-year old if I thought he'd actually wear it.


Monday, January 30, 2012

Week 5 - Crockpot Mexican Chicken

I went scanning Pinterest yesterday for something new to try out with chicken.  We eat a lot of chicken - it's good for you and we have a place where we get it cheap.  Unfortunately, it can get boring doing the same things with it over and over again. Before I'd gotten beyond my main page on Pinterest, I saw a recipe that a friend of mine had posted.

Mel from The Larson Lingo posted the recipe I selected for dinner.  On my hubby's way home, I had him stop to pick up the couple of ingredients we would need and didn't already have.  Here's what you'll need:

- Frozen Chicken Breasts (I had a family size pack of thighs that we used instead.)
- 1 block of cream cheese
- 1 can of black beans
- 1 can of whole kernal corn
- 1 can of Rotel tomatoes (We used the lime and cilantro ones.)
- whatever you want to serve them on or top them with (our choice was corn tortillas that we fried up and topped with shredded cheese, sour cream, guacamole, and salsa)

Here's what you do (and what I did):
- Drain the beans, corn, and tomatoes.  Be sure they are drained thoroughly or this dish will end up soupy.
- Place your chicken in the slow cooker then top it with the cream cheese, beans, corn, and Rotel.  Since I knew we would need to remove the bones and skin from our chicken, I cooked it first on its own then put it all back in together once the chicken was done.
- Cook it on low 6-8 hours, stirring every couple of hours - mine only took about an hour to cook on high since the chicken was precooked.
- Turn the slow cooker off and allow the dish to set about 30-45 minutes.  This is essential since it will still be slightly soupy to begin with.  As it sits, it thickens up.
- Serve up and enjoy!!


Let me just say that the possibilities for this are endless.  Mel served hers over rice and on flour tortillas.  We served ours on corn tortillas that my hubby fried up.  The next morning, we even used some to mix in with some scrambled eggs, which was delicious!  If you have kids who are picky, don't let that discourage you.  Neither one of my children is a fan of black beans, nor am I, but my whole family ate this dish until every bite had been devoured.