Showing posts with label crochet. Show all posts

Sunday, February 5, 2012

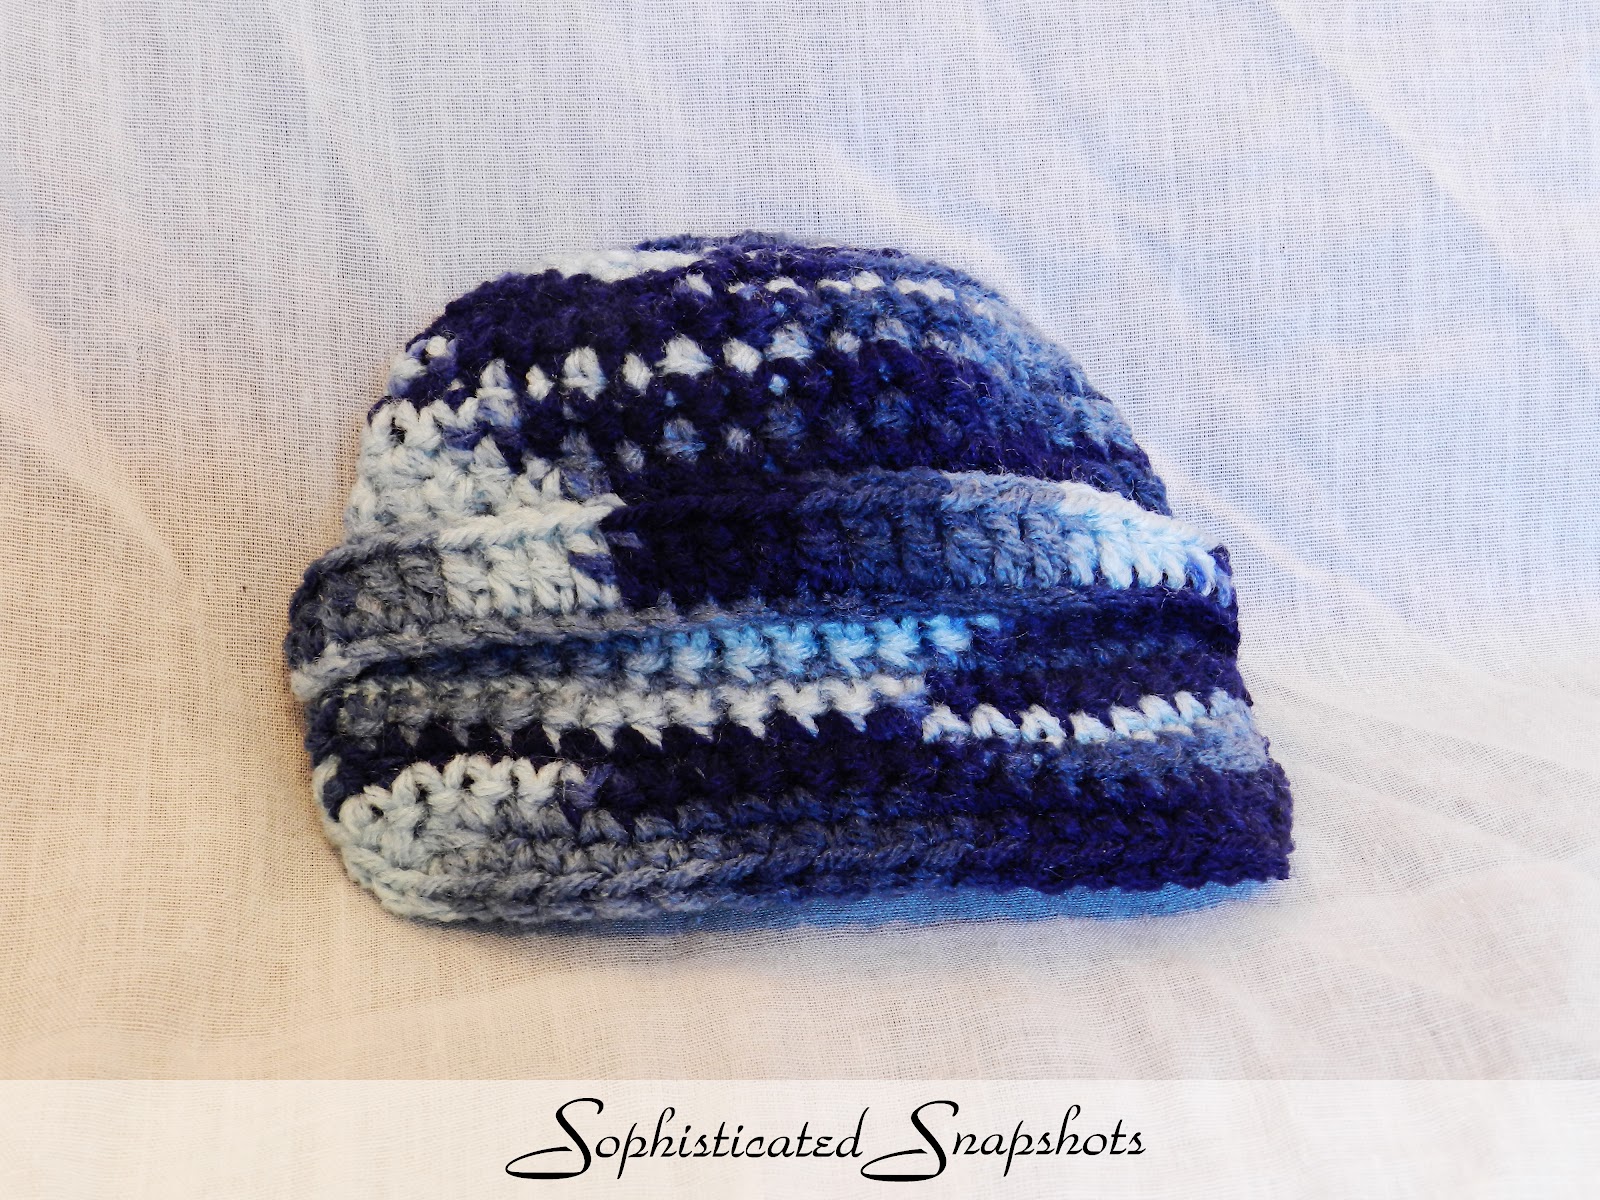
Week 6 - Crocheted Slouchy Hat


This was one of the first hat patterns I came across when I started learning to crochet.  I attempted it two different times before this and was unsuccessful.  As I sat watching one of the many awards shows on this time of year, I decided to make one final attempt.

The pattern was created by Julie at Gleeful Things.  The pattern actually calls for one skein of heavy weight yarn.  Since I didn't have any heavy weight yarn on hand, I opted to do a double strand of worsted weight yarn.  This hat was made with Red Heart Super Saver in Shaded Dusk.


If you're interested in making one of these for yourself, you can find the pattern here.  If you don't know how to crochet but would like one, you're welcome to pick up the yarn of your choice and I'll make you one.

The hat is super cute for all hair lengths, though it is tricky to put on if you want to do it without pulling your hair back into a ponytail first.

Week 5 - Crocheted Camera Strap Cover

I have come across all kinds of designs for DIY camera strap covers, all of which were sewn.  I have really been wanting to make one, but just don't have the money to go shopping for supplies right now. With a wedding and a family shoot both coming up within the next couple of weeks, I knew I needed to find something that was more comfortable.

One night I opened my email to find this pattern by Rachel at Maybe Matilda sitting there in all of its glory just calling my name.  I pulled over the leftover yarn from my daughter's Simple Kerchief since it's super soft and got to work.

This cover is removable since it's not crocheted around your strap, but let me just say that it is super tricky to get on since the ends are narrowed.  In the end, though, it is so much more comfortable to wear the strap now and is definitely worth the hassle.


Wednesday, February 1, 2012

Week 5 - Little Brimmed Hat

Of the crocheted hat patterns I've completed, the majority have been for little girls.  I recently came across an adorable newsboy-style brimmed hat that I knew had to be my first for boys.  The pattern came from Kristi at Knotty Knotty Crochet - you can find it here if you want to try one out for yourself.


I selected a variegated yarn from the Red Heart Super Saver line called Shaded Dusk.  I have not yet picked up any buttons to stitch on, but will be doing that soon.  I absolutely can not wait to try this on an adorable baby boy - I'd make one for my 3-year old if I thought he'd actually wear it.


Thursday, January 26, 2012

Week 4 - Simple Croheted Kerchief

I came across another pattern on Pinterest that was created by Anneliese at Aesthetic Nest.  Her blog is quickly becoming one of my favorites for crochet patterns.  This pattern was for the Simple Kerchief.

My daughter, Daisha, has hair that is absolutely unruly and near impossible to tame.  To help, she loves to take funky, colorful bandanas and fold them in half to tie around her head.  She says it reminds her of Cinderella at the beginning of the movie.  :)  I had picked up a skein of beautiful and super soft yarn - Loops & Threads Impeccable in Holland Ombre.  I knew that this design would be perfect for the yarn so I got started.


If you look at the pattern, which can be found here, you'll notice Anneliese added a flower to hers.  I was going to do that as well, but Daisha liked it without the flowers instead.


Wednesday, January 25, 2012

Week 4 - Hello Kitty Hat

My neighbor has a 5-year old granddaughter who absolutely LOVES Hello Kitty.  It is because of her that anytime I come across a Hello Kitty craft project, I usually pin it with her in mind to do it later.  With the cool weather finally upon us here in Southwest Alabama, at least periodically, I knew it was time to make her this hat.  

The details in the hat are so cute... and were relatively easy to do.  


The original pattern came from Amy at Crochet Creative Patterns.  I used the pattern as a guide more than anything, making my own changes to it.  She has the size guide for lots of ages, but the right size didn't seem like it was going to be big enough.  I also considered that the recipient of this hat has lots of thick curls to fit underneath.  I worked the original pattern, increasing on 2 additional rows to make the hat larger.

I also made some changes to the piece that hangs from the earflaps.  I used 3 24-inch pieces of the black, white, and hot pink yarn.  I pulled the pieces through a gap in the yarn at the bottom of each earflap, tying it off with a spare piece of yarn just underneath the earflap.  This allows the braid and tassel to be secure enough to not fall off.  From there, I just grouped the yarn into three sections and braided them together.  The ends were tied off with another spare piece of yarn, leaving enough at the end to give it a tassled look.


The final product turned out better than I had hoped, especially after starting it over twice in an attempt to get it the right size.  And the part that most surprised me is that in the end, it took only one day to make.
As far as the yarn goes, I used a variety of what I had on hand:
- Red Heart Super Saver in Soft White (1 skein)
- Loops & Threads Impeccable in Black (1 skein)
- Caron Simply Soft in Watermelon (1 skein)
- Bernat Baby Soft in Soft Yellow (1 skein)
The pattern called for a variety of hook sizes.  I used a size H hook for the hat ears, and earflaps, rather than size I as recommended so that the gauge was a little tighter.  (This is also part of why I had to increase on additional rows to get the correct size.)  The pink border around the bottom, as well as the eyes, nose, and bow, were done with a size G hook.  

If you're interested in trying out this pattern yourself, you can find it here.  

Saturday, January 21, 2012

Week 3 - Crocheted Crown


One of my favorite subjects to shoot through my photography business Sophisticated Snapshots is children.  Because of this, I've discovered that crocheting some of my own accessories can be cost-effective and give the photos a warm feel all at the same time.  And it allows me to fulfill my need to craft.  LOL

I got so excited when a found the Pin for this crown.  The original pattern is from Alli Crafts and can be found here.  The pattern is available in sizes newborn through 2T.  I pulled out some leftover Bernat Baby Sport yarn I had leftover from other projects and tried it out.


I can't wait to make a few more of these in different sizes to use as props... and in different colors!

Week 3 - Crocheted Baby Cloche


Crocheting has become a new hobby of mine.  That means that throughout the course of this challenge you will likely see many of the crochet projects I come across on Pinterest.

I have never made a hat, as working in rounds seemed tricky at first.  I finally gave it another shot and it worked.  YAY!  A few months back, my childhood friend, Nikki, gave birth to her second son, Collins.  Unfortunately, due to unforeseen complications, Collins left his family and all those who loved him to be with God.  After losing her beautiful son, Nikki decided to that something good should come out of such a tragedy.  She started a cause called Caps from Collins.  Through this cause, she collects and crochets caps that she then provides these caps to the NICU at a local hospital and to Now I Lay Me Down to Sleep.  The caps are given to the children in the NICU who are fighting for survival.

Nikki's story was what inspired me to learn to crochet.  Being a mother of two, I could not imagine the pain of losing a child, and wanted to be able to help make the caps that are sent to those children fighting for their lives before they've even had a chance to begin living them.

I found the link to the Pin through AestheticNest.  Anneliese has the original tutorial posted here, as well as a downloadable pattern here on Scribd.com.  The pattern has several sizes you can use, to make the cap fit babies from 0 months up to 12 months.

Despite what the pattern called for, the only yarn I had available at the time I made this was Bernat Baby Sport yarn.  It was leftover from an afghan I had just finished for a friend.  To make the cloche a little thicker, I opted to use two colors of the Baby Sport:  Peach Blossom and Baby Pink.  Then I used one strand of the Soft Yellow to make the flower.  I still used an size H hook to get the gauge right.


I love the eyelets at the bottom of the cloche.  They give it a girly touch.  


And in the end, the hat kind of looks like it belongs back in the 20s on a flapper girl.  I think I'm going to try one using brown and a baby pink yarn, or maybe a sage green, to give it a vintage feel! 

Wednesday, November 30, 2011

#2 - Learning to Crochet and Crochet-Along Project

For months I've looked at the pictures of all kinds of adorable projects a few friends of mine have crocheted.  I learned how to do the basic chain stitch about a year ago when my step-mom taught me so I could make fun fur flip-flops for my daughter and her friends.  I decided that it's time to quit saying I'm going to learn and just do it.

Since I don't have any friends nearby who crochet, I took to the internet and of course, Pinterest was my first stop.  Through my Pinterest friends, I found this tutorial through Maybe Matilda.  Rachel did a "Crochet Along" a few months back that I am now prepared to work my way through.  For the first step, she taught the chain stitch, which I refreshed myself on, the single crochet, and how to turn your work.

I have some leftover yarn from a past project and my crochet hook from doing the flip-flops so I pulled those out to practice.  I did these basic steps over and over again, just pulling out my work and starting over from time to time.  With just the basic single crochet stitch, I got bored quickly.  The next step was to learn the half double crochet and double crochet, as well as increasing and decreasing.  The double crochet is the only one of these I've really played with.  Here's one of the squares I've practiced making:


I haven't made anything to keep yet... I asked Santa for some new yarn in my stocking so I can really get down to work and start learning more seriously.  And today I plan to take on the half double crochet so I can move one step farther with the learning process.  YAY!

UPDATED (12/01/11)
I decided to go through and do some more practice for each of the basic stitches.  I realized that I had been making things much harder on myself than necessary.  I hadn't paid attention to the portion where she explains that when working the various stitches, you go through both the front and back loop of the chain below once you get past the foundation.

I did a big chunk of stitches, working my way through Single Crochet, Half Double Crochet, and Double Crochet.  This is definitely getting easier!  Here's how my practice turned out:

Now that I've gotten more comfortable with the basics, I decided it was time to try the Crochet-Along project - a cowl.  The pattern was provided by Lion Yarn and can be found here.  I picked up my yarn at Joann's, as well as a bigger needle.  The pattern calls for Wool-Ease Thick & Quick Yarn and a size N-13 hook.  I picked up the Chunky Wool-Ease Thick & Quick in Charcoal.  Unfortunately, Joann's didn't seem to have the Lion Brand hooks so I bought a different brand and got size N-15.  It is slightly larger, but has worked well with the Chunky yarn.  

I came home, got everything out, and sat down to go to work.  


I followed along with Rachel's instructions for the first two rows and after 4 hours, was very proud of myself for having about 6 inches done.  I leaned back and looked at my work, realizing something wasn't right.  I pulled my work back out and tried again, only to end up with the same result.  UGH!  I couldn't figure out what I was doing wrong.  I decided to call it a night since it was getting late.  

I woke up yesterday morning determined to solve my problem.  I pulled Rachel's tutorial back up and immediately spotted my problem.  I hadn't realized  that "in each ch-2 sp across" meant the spaces I created by making the V-stitch in the chain below.  I had just been re-creating the V-stitch in every 2 chains.  WOW! That was a lot of wasted time.  

Now, less than 24 hours later, I have completed 36" and am ready to stitch the ends together.  (The pattern recommends 52", but I think that with the thickness of the yarn, 36" is plenty for me!)  Since I forgot to buy a needle with a wide eye, I decided to double crochet the ends together.


I absolutely love how the finished project turned out!  I can't wait to wear it out.  I may have to find some sparkly yarn and make one to wear to Christmas parties.  :)