Sunday, March 18, 2012

Week 12 - Owl Earflap Hat


I came across this adorable hat a couple of months back but had no reason to try it out yet.  Well, my friend Samantha changed that this week when she asked me to make one for her daughter.

I have to admit that I was super excited to start a new project - it had been more than a month since I'd worked on any crocheted projects.  And this one was so much easier to do than I expected... I had it done in just a few short hours.

The design came from Inner Hooker, a wonderful site for purchasing some adorable patterns.  If you like to crochet, I highly recommend checking out the site.  The patterns are very affordable.

The colors I chose to use for this pattern were purchased at Michael's:
- Red Heart Soft worsted weight in Berry
- Loops & Threads Impeccable medium weight in Grass

Thursday, February 23, 2012

Week 8 - Tie the Knot Photo

I came across a beautiful idea on Pinterest for a "Tie the Knot" photo...  I decided to try it out at a wedding I shot this past weekend and love the final result.

The original photo link is no longer showing on my Pinterest board for whatever reason, but was actually done with twine.  I opted for ribbon since I didn't have any twine handy.  I tied the ribbon between two chairs and used the cloth hanging over the edges of the tables as my backdrop.  After editing out some unwanted shadows and throwing one of my favorite textures onto the shot, I had this final result.  The Bride and Groom love how it turned out - and I loved it so much it is now on my new business cards!

Monday, February 20, 2012

Week 8 - Eyebright Technique for Photoshop

I wondered how people always make eyes look so amazing in their photos.  I came across a pin that gave a step-by-step tutorial for Photoshop and decided to try it out. The original link can be found here on DeviantART - I still posted the tutorial below as well.  I followed the instructions and got the results above.  It's quick, simple, and one of many options I have ended up discovering as I've learned my way around Photoshop more and more.


Friday, February 17, 2012

Week 7 - Taco Bowls


This idea comes from Emily at EmilyBites - her instructions can be found here.  A few weeks ago I showed you our family's attempt at Crockpot Mexican Chicken.  When I came across this idea, I just knew that it would be a fun way to serve this up, as well as our other favorite southwest dishes.

You start by preheating your oven to 375F.  Next, sprinkle some water on both sides of your corn tortillas. Stack them on a plate and cover with another plate turned upside down.  Pop them in the microwave for about a minute or until warm.

To bake the tortillas, turn a 12-cup muffin tin upside down.  You will want to spray your tortillas lightly with some non-stick cooking spray.  Place them on your muffin tin as shown in the photo below.


The only thing left to do is to stick them in the oven for 8-10 minutes.  They don't get as crunchy as if you were frying them, but you could turn the broiler on for about 30 seconds to resolve that issue.


Fill with your favorite toppings and serve while still warm.  The kids absolutely loved them!!

Week 7 - Glittered Heels


Today's project was inspired by Geneva at A Pair and a Spare, as well as all of those glittery heels seen around on women's feet.  I am not a huge fan of heels - it has nothing to do with not liking to walk in them, but rather that I am not a fan of shoe shopping.  I know this may seem unbelievable since I am in fact a woman, but I have never been a big shopper of clothing and accessories anyway.

I have a pair of plain boring black pumps that really need some spicing up.  I decided to try this technique, doing only the heel itself rather than the entire shoe.

 Gather the supplies you'll need:  your heels of choice, glue (I had prepared to use Mod Podge but she recommended regular Elmer's ), and glitter.  If you want a more "polished" look, choose a fine glitter - regular craft glitter isn't going to look as nice when you're finished.
I started by attempting Geneva's use of the paintbrush and very quickly changed my mind.  It was taking forever and didn't seem to be working so well.  You can try the painting method if you want by simply mixing some glitter into your glue.  

Apply the glue and glitter mix to your shoe in the areas where you want it.  If you're planning to do the entire shoe, it would probably be better to work in sections, allowing each one to dry in between.

What you see in the photo was taken after I got frustrated with painting the mix on and used my finger instead. I used the glitter/glue mix I'd already made then just sprinkled on more glitter as needed.
The finished product turned out so great.  This is just a close-up, which actually looks better than the shot at the top - glitter tends to reflect light (duh!) so it almost looks as if there is still wet glue in the other shot.  I haven't worn my "new" heels yet, but I plan to do so very soon!!

Tuesday, February 14, 2012

Week 7 - Bottle of Quotes


I came across the idea for the bottle of quotes back before Christmas.  My original plan was to put a quote in every day for a year then give it to my sweetheart on New Year's Day 2013.  Unfortunately, I completely forgot about it until about 3 weeks into January.  It was then that I decided I would make it a bottle of love quotes, one for every day of the year.

The original idea was posted on Craftster - you can find the link here.

The pictures are fairly self-explanatory so just follow along.  One note, if you're going to attempt this project, get an oversized wine bottle.  I was unable to fit all of them into the bottle so I refill it periodically as my hubby reads the quotes.


Wednesday, February 8, 2012

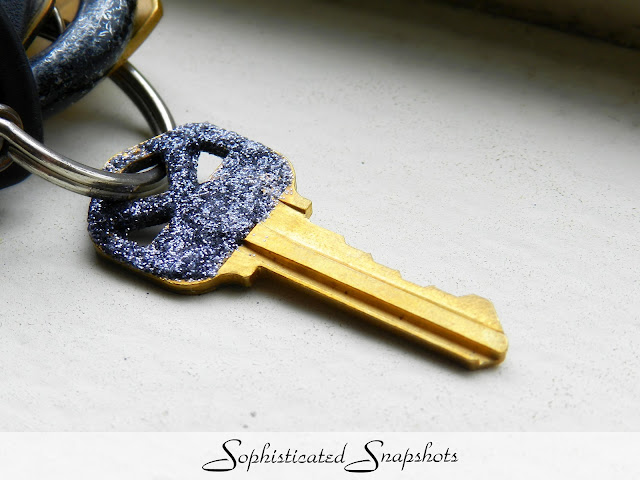
Week 6 - Glittered Key


I hate how boring keys look.  I refuse to spend $4.00 or more for the decorative keys you can buy and have cut, especially when we're renting an apartment, so it's a key that I'll eventually have to give back to the landlord.  Needless to say I was excited to find this fun and simple way to decorate my house key.

I don't know where the original idea started since the pin I found went to nowhere, but I followed the instructions in the description and it worked.


The items I needed were simple:  my key, some Mod Podge, and glitter.  Apply Mod Podge all over the key, doing one side at a time.


There are two ways to apply the glitter.  You can apply it with a brush, or just sprinkle it onto the key.  For trial purposes, I tried both and using a brush was just a pain.

Be sure to apply a good coating of the glitter. Wait until the key is completely dry to shake off the excess.  Once dry, apply another coat of Mod Podge to act as a sealer.  Follow the instructions to complete both sides of the key and you're good to go - a pretty new personalized key.